Thursday, September 27, 2012

Pearl Izumi P.R.O. Aero Glove Review Update – “Houston, We Have A Problem.”


Sometimes you really have to live with a product before you get to know it well.  It’s kinda’ like being married.  Well, I wrote a review of my 2012 Pearl Izumi P.R.O. Aero Gloves back in July, and I gave them a raving review.  Well, the proverbial honeymoon is over.

As I had mentioned in my previous write-up, I loved these gloves, and they had become my “Go-To” set whenever I rode.  I carefully put them on, carefully took them off, hand washed them after every ride in detergent made for delicate garments, and hung them to dry, per the manufacturers instructions.  Alas, it was to no avail.

After one ride late August, I noticed a faint black tint on my hands, and I washed the gloves thinking nothing of it.  The next time I rode the blackness on my hands got worse.  Again, I washed and hung dry the gloves.  This time, the black tint got onto my drying rack (which is white metal), and I could see the gloves’ palms were color-bleeding badly.  Well, I used them one more time to see if they would cease to bleed, but the dye was all over both hands, and if I touched anything, it got dyed, too.  Pretty hearty stuff, this dye.  According to the Pearl Izumi website, the gloves are constructed with “Pittards® WR 100X Natural Carbon Leather palms,” which are “69% genuine leather 19% polyamide 12% polyurethane.”  That indeed sounds like pretty important stuff, until it begins to bleeds on your hands, that is.

I have had these gloves since April, and the whole color-bleeding thing is a mystery.  I have never had any other set of bicycling gloves run like this, and some of them I have had for over two years!  The only time I have seen a real (or synthetic) leather glove run was when I bought a new pair of motorcycle gloves.  In those cases, the gloves color-ran right away and faded with time (which is normal), but not the other way around.

Currently the gloves are at Tweaked Sports while they check with Pearl Izumi about the situation.  So far, it has been a very slow go, and I am not sure what the status of my warranty claim is.

However, it has already taken way longer than it should – Over five weeks, and counting.

Monday, September 24, 2012

SRAM Red OG-1090 Cassette Review


                                                                    Image courtesy SRAM

One of the nice things about Frankenbike is its ability to utilize just about any component out there.  Case in point, a lot of people claimed you could not use SRAM Red components with Shimano 105 and Ultegra parts.  Yes, you can.   And, with the kind assistance of my friendly, local, Tweaked Sports parts house, I set out to sample high-end cassette bliss with a Red OG-1090, 11-28 unit.  

Highlights are:
  • Lightweight: Innovative CNC‘ed chromoly steel construction.
  • Durable: 35% harder than titanium!
  • Stiff: 15% stronger than its competitor.
  • OpenGlide technology allows for smoother transition between gears.
After seven months of riding with it, here is what I thought.

The beauty of the Powerdome is in its construction.  Machined from a solid piece of metal (save for the two smallest cogs), it is extremely light, and it is a dream to shift with.  The “OpenGlide” technology allows quicker gear transition via strategically removed teeth off of the cogs.   Oh yeah, it is a bit nosier than any Shimano or Campagnolo cassette, however, I believe the noise complaints are an overrated “Issue.”  Weight is approximately 166 grams for the 11-28 version, and I could go to a smaller cassette, however, I am not a young pup, anymore.

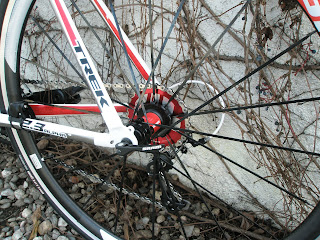
                    Frankenbike with 11-28 OG-1090 Cassette, KMC chain, and Shimano 105 derailleur

I am currently running the OG-1090 with a KMC chain, plus Shimano 105 derailleurs and shifters.  Performance has been superb, with the only issue being the inability of 105 components to stay in tune for any length of time.  The cassette, thus far, has shown zero indications of wear.

In the end, I made a few welcomed discoveries.  One, I can climb by staying in my personal cadence-heart rate parameters (thus my SRAM PG-1050, 32-tooth “Pie Plate” can be saved for truly insane verticals – Like some rides I do at Lake Arrowhead, California), and SRAM Powerdomes are the Bee's Knees - Light, awesome shifting, and not all the noise and chatter usually reserved for people describing their experiences with them.

I wonder what the new XG-1090 is like?  Hmmm…

Till next time.

Friday, September 21, 2012

Fizik Microtex “Superlight” Bar Tape – Hurts So Good.


                                    "Glossy" Is Available In Three Colors - Photo Courtesy Bicycling

Bar tape, that stuff most riders take for granted, think very little about, and yet come in contact with everyday.  Well, a very good friend of mine recently showed up on a ride with this completely awesome looking, brighter than red tape.   It was Fizik Microtex “Glossy” tape.  Since I am into all things red, I just had to have some for my trusty Trek 2.3, coffee-seeking, Frankenbike.

Now, this is where emotions took over from reason, as I actually went out and paid full-pop retail for the stuff at InCycle.  See, I do have my resources for supplies, and being I am not a trust-fund baby, I have to be careful to get the best bang for my limited “Bike Goodies” bucks.  Well, the eBay effect took over, i.e., “Instant Gratification,” and I did the deed – All for $24.99 USD, plus beautiful, ever-escalating, California sales tax.  A new box of what Fizik calls “Red Glossy” was finally all mine.

To date, I have tried Bontrager, Ritchey, Profile Design, and now the Fizik brand, world-famous Microtex.  Wrapping is indeed a semi-art form, and when done correctly, it can look great, give good tactile control, and really punch up your ride, looks-wise.  Fizik was a whole other animal.

                                 Work In Progress - The Old Ritchey Tape Is On The Left.

The stuff was, in complete honesty, a royal PAIN IN THE ASS to install.  The material is thicker and a whole lot less forgiving to work with than any other tape I have used.  Oh sure, it looked  killer when finished, but going on it was not very forgiving, was prone to wrinkling, and took way more human strength to keep taught than should be necessary.  My hands hurt for two days afterwards from the marathon session of the constant application of tension.

And the result?

So far, the tape looks good, feels great, is not slick at all (as some people have inquired), and the best part, other than the looks, is it cleans up sooooo easy!  No more one ride and it looks dirty stuff for me.  I just hope this product has some longevity to it.


Wrapping a bar is indeed a skill all riders should know how to do, however, if you buy Fizik Mircotex, be prepared for the fight of your life to get it to look right.

Or, you can pay a shop to do it.

It’s a lot less painful if you choose the latter.

Monday, September 17, 2012

Tested: GU Electrolyte Brew


Ride hydration ranges from plain ‘ol water to super, high-tech, chemical-wonder concoctions.  Finding one which works for you is similar to finding a saddle that soothes your bottom for the long haul.  In other words, it is a highly personal thing.  In over two years of road riding, I have basically only used GU Electrolyte Brew as my drink of choice.  I feel this gives me a pretty good perspective on how the recipe performs.

When I began to ride, I used to drink only straight water, just as I had during my running days.  It is the best, most natural, most available, and decent tasting thing out there.  Or, so I thought.  As rides began to get longer and longer, I felt I was just not getting all I could out of straight water.  Plus, as I began to investigate all things cycling (reading, talking to other riders, manufacturers, etc), I found one of the keys to more productive riding was the addition of natural sugars (fuel), carbohydrates, proteins, sodium (and other minerals) and vitamins, replacing items lost/used-up during vigorous exercise.

Enter the Electrolytes

Electrolytes are basically acids, bases and salts.  Some of the most important electrolytes are sodium, potassium, calcium, chloride and magnesium.  In order to function properly, the body must contain a proper electrolyte balance inside and outside of your cells so they can properly transport water to and from the body’s major systems. Electrolytes basically work via “osmosis,” which is the transport of fluids from one cell to another. The salt within your cells keeps the body hydrated, regulates blood pH, and ensures that the muscles and nerves are properly functioning.  So, now you know the why part.


GU Brew is powered by maltodextrin and fructose and meant to be mixed with plain water.  GU Electrolyte Brew comes in powder form in a 35-serving container, one serving packets, and tubes of 12-servings, dissolves-in-water tablets.  The tablets are the most practical, as they are compact, fit in a jersey pocket or seat bag, and come in six flavors - Orange, Strawberry-Lemonade, Tri-Berry, Pink-Grapefruit, Peach Tea, and Lemon-Lime (my favorite).  One (1) serving (tablet) provides 10 calories, 320mg of sodium, 1 gram of carbs, 55mg of potassium, and 1 gram of sugar.  If you are seeking protein, go and find it in your ride food.  Better to get it there, anyway.  

The powder comes in Orange, Lemon-Lime, Raspberry and Blueberry-Pomegranate.  Each form of Brew is meant to be consumed before, during and after workouts, the complex-carbohydrates, sodium and potassium are meant to keep your body at peak levels, without bonking.

To date, I have tried Gatorade, PowerAde, Hammer, and Nunn, however, I kept coming back to the GU Electrolyte Brew.  It tastes great, has all of the ingredients to keep me properly hydrated, and does not mess with my stomach.  GU Brew has been the only one that I can drink as is.  It does not need to be diluted, nor added to, just to get it right.  

GU products are available just about anywhere.  

Friday, September 14, 2012

Cycling Don'ts.

                                                                   Spotted in Houston, Texas

OK, we can forgive the lack of a helmet and proper cycling shoes, but a thong?  Really?

True, real photo, folks. 

Tuesday, September 11, 2012

SRAM S40 Wheelset Review.


One thing that will definitely perk up your ride is a new set of wheels.  Well, being I am as curious as the proverbial cat when it comes to new things, when the opportunity arose to try out a set of SRAM S40, 38mm clinchers, I jumped at the opportunity, courtesy of the kind folks at Tweaked Sports of Glendora, California.

While I really like, and have used Mavic Cosmic Carbones (52mm depth), I was anxious to try out the carbon clinchers offered by SRAM.  Unlike the Mavics, which use basically a carbon fairing on an aluminum rim, the SRAM’s use unidirectional, Zipp derived Toroidal cross-section carbon as a structural part of the rim itself (SRAM owns Zipp).  The upside - Stiffness and strength.  One downside - The tire, tube and rim strip must come off if the need to true the wheel arises (it did – More than once!). 


And as for the ride, well, I have been very impressed.  While I was also offered a set of S60’s (58mm deep), I am happy to have chosen the S40’s.  These things are truly comfy too, with actual, real rolling compliance.  Carbon clinchers are a nice, everyone’s version of the Holy Grail of cycling – Carbon Tubulars.  While I have not ruled out trying tubulars in the future, the convenience of clinchers is indeed hard to pass up.  The advertised weight is 1740 per pair, with stainless, bladed spokes, cartridge bearings, and stainless steel skewers (I now have the Titanium skewers).

I do have to say (coming off of Mavic Ksyrium SL’s) that deeper wheels do indeed keep the pace when spun up to speed.  Seat of the pants evaluations on my usual test course indeed showed a marked increase in speed from two to five miles per hour, all things being relative (like wind).  They do take some effort to get up to speed, however, once there, they are quite easy to keep up to speed.  Besides, nothing says cool like the sound of deep carbon wheels at speed, anyway.

Statistical Outliner or Just the Status Quo?

In June I did the Ojai, California Century, and even with the weight of the wheels, they performed admirably on the hilly course.  However, I broke a spoke off the rear wheel right at Mile 97, just after bombing down Highway 150 (Dennison Grade) into the Ojai Valley.  Now, the wheels had a reported habit of breaking spokes in previous generations, and SRAM assured consumers the issue had been rectified.  It appears to not be so.  An online search unearthed an excessive number of reports on SRAM carbon wheels regarding broken spokes.  I, unfortunately, found these reports to be true. 

The real bummer was dealing with SRAM – Sort of.  The originating wheel shop seemed to have problems getting any action on replacement spokes, however, I am not too sure that SRAM was completely culpable there.  Tweaked Sports told me two complete sets of spokes (front and rear) were on their way, and that never panned out.  So, I turned to Michael at Pasadena Cyclery, and he had a replacement set on the way the next day.  Well, again, sort of.  He was told that a complete set of spokes for the rear would be coming, but that in actuality turned into three (3) spokes in total.  Instructions were to replace the broken spoke and the two adjacent ones.  


OK, so I had this done along with a front and rear truing.  I had four rides on them and about 200 miles (about 1000 miles total out of the box) since repair and truing, when I recently discovered the rear was out of true again (loose spoke).  Now, I understand that not all is perfect out of the box, but c’mon, SRAM!  Did you not learn anything from the numerous issues listed on the good ‘ol World Wide Web?    

Well, it remains to be seen how these wheels will play out in the long run.  They do roll smooth and true, that is, when they REMAIN smooth and true.  I will see how it goes from here and report back if necessary.  

The sucky part was being off of the wheels for two and half months.  No one should have to experience that as a consumer. 

The fact the wheels look so darn cool should dull the pain a little.

Till next time.

Sunday, September 9, 2012

Frankenbike – The Rolling, Reliable Testbed.


So, just who am I, and how did I come to riding, and ultimately, editing a cycling blog?  I could go back all the way to the day I learned to ride a Schwinn Sting Ray as a boy, or the day I got my first ten-speed from Toys ‘R Us, or my first real road bike in 1985 (a Nishiki Sport), but I will start with the purchase of a Trek 4500 mountain bike in 1996. 

It was the 4500 that got me kinda’ bitten with the road-bug after I put slicks on it in 2009.  Prior to that, it made a few trail rides, a lot of street rides, and spent even more time as a clothes hanger.  Then, I got serious about my fitness.


                                                      1996 Trek 4500

I rode the 4500 until I was maxing out the gears and thought I needed a new, proper road bike.  I sold the 4500 in 2010 and went looking for a new ride.  I had no exact idea of what I wanted, or even what I needed, however, being that Trek was the only product I knew and understood at the time, I looked for an aluminum framed road bike.  Carbon was still a complete mystery to me.

So, I began researching Trek bikes on the net and saw some I believed would fit the bill.  It was during this time I discovered what should be, if it already is not, one of cycling’s prime axioms – Buy the best equipment you can almost afford.  So, while looking at the 1.1, 1.5, and 2.1, I decided on the 2.3, Trek’s top of the line alloy road bike (in the USA).  The 2010 Trek 2.3 came stock with a complete Shimano 105 build, Bontrager branded Race wheels, a carbon fork and a carbon seatpost.  It also came with house branded tape, R1 saddle, and an alloy bar and stem.  I rode it in this exact configuration only once.


                                                      2010 Trek 2.3

My initial forays on the 2.3 were a little odd, and the learning curve was thankfully short.  The first thing to master was the clip-less Look pedals (the 4500 had clips).  The second were the STI shifters (Shimano Total Integration).  I was only used to downtube units, so this whole brake lever-gear shifter thing was completely new (I have also since discovered 105’s durability is matched by its inability to stay in tune for any length of time). Fortunately, I leaned it quickly, as well.  Still, the whole clip-in, clip-out thing took some getting used to, especially the clip-out part.  To date, I have only fallen over by failing to clip-out on two occasions.

So, just how did the metamorphosis into Frankenbike begin?  

Personalization, comfort and performance are the name of the game in cycling (in my case, I can also add fate to that mix). The first thing to go was the Bontrager R1 saddle, which was swapped for a WTB Silverado unit.  The next thing to go were the wheels.  A member of the riding club I had joined (a good thing to do, especially if you are a new rider) had a spare set of Mavic Ksyrium SL’s, regulating the Bontrager’s to indoor trainer duty.  After that came a major upgrade.  To better cope with the hills in my area, I swapped the stock Shimano 12-27 cassette for a SRAM PG-1050 11-32 and a Shimano 105 GS, long-cage rear derailleur.  Then came a Ritchey WCS 4-Axis alloy 120mm stem, WCS Logic II alloy bar (with Ritchey tape), a WCS alloy seatpost, and a WCS Carbon Streem saddle.  Then came an Ultegra crankset and bottom bracket (not by choice – See below), and finally a SRAM Red OG-1090, 11-28 cassette, Red/Black brakeset, and S40 wheels.  Oh yeah, somewhere in there a Garmin Edge 500 found its was onto the bike, as well, replacing the original Bontrager Trip 1 computer. 

The WTB saddle worked out OK, but it was a bit too dished for me, so that got sold to a Fat-Tire friend of mine.  As for the crankset, well, after a mis-adjustment by a careless mechanic destroyed the big rings, that shop stepped up and replaced it with an Ultegra crankset and bottom bracket.  The increased stiffness was immediately noticeable. 

The Bontrager Race wheels, while having a pseudo-aero profile and bladed spokes, weighed a ton.  Well, to me they did.  My 2005–ish Mavic Ksyrium's come in at 1540 grams, and the Race’s were a portly 1929 grams.  The SRAM S40’s I am currently evaluating/using run 1740 grams, however, their 38mm depth, and surprisingly compliant ride, has me using them as my daily wheel for all occasions. 

I must also mention during this period I have become very good friends with a supplier of mine, Tweaked Sports of Glendora, California, and they have not only provided top-notch customer service, but they have also provided me a with quite a lot of products to test. 


                                       "Frankenbike" as of September 2012

So, (thanks to Tweaked Sports) my 2.3 has now become a rolling test-bed as well as my daily rider.  As it currently stands, it is rigged with the aforementioned SRAM S40’s, Titanium skewers, Red/Black brakes, and Red OG-1090 11-28 cassette, Ritchey WCS Logic II bars, WCS seat post, WCS Carbon Streem saddle, WCS C260 unidirectional (UD) 120mm carbon stem, Shimano Ultegra crankset and bottom bracket, 105 shifters, front derailleur, long-cage rear derailleur, Blackburn carbon cages and Michelin Pro 3 Race tires

So there we have it.  What began as a simple jump back into road cycling after 25 years has now become my rolling-reliable test bed for new products.    However, I love it, I will keep it, and I will continue to use it even after my first carbon bike arrives.   It is now what one rider at an on-line forum once wrote, “No longer a 2.3.”

Maybe, it isn’t.  But, it still flexes like one.

Now, if I could only settle on one complete gruppo.

Saturday, September 8, 2012

Photo Of The Day.

                                     Shot location: Greenville, South Carolina

We don't have bike trails this cool in Southern California.